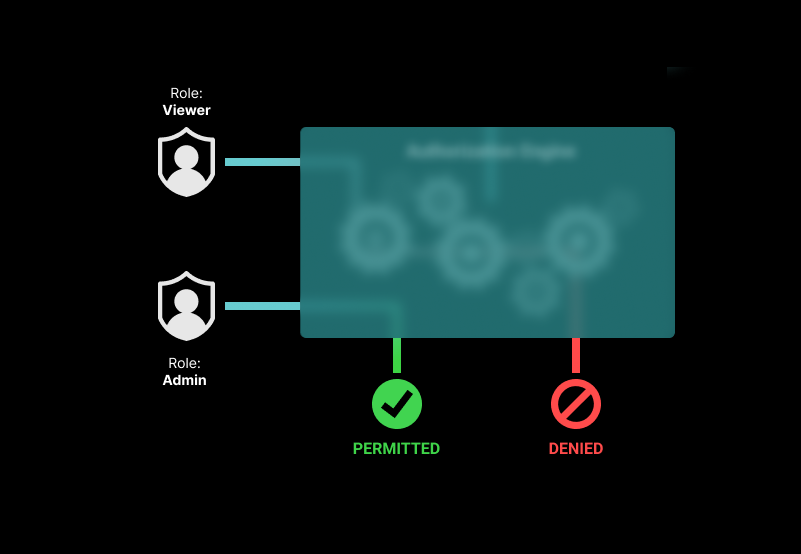
Role-based access control and attribute-based access control are two popular forms of authorization. With role-based access control (RBAC) sets of permissions are aggregated into distinct roles that are assigned to users. RBAC policies are simple to put in place and reason about, but the number of roles can grow out of hand when attempting to enforce finer-grained restrictions.
Attribute-based access control (ABAC) allows for fine-grained access control. This is done by focusing on dynamic attributes of the user (team, seniority, project, etc.), resource (document owner, creation date, etc.), and environment (time of day, day of the week, IP address, etc.) rather than on static roles. The result is an authorization system with the flexibility required for fine-grained access control. But ABAC tends to have a heavier initial lift than RBAC and requires some up-front design to set up properly.
Each model has its pros and cons. Read on to learn more about these access control patterns, their limitations, and access example policies.
Role-based access control (RBAC)

Role-based access control is arguably the most popular access control model. In this model, permissions are grouped to form roles, such as "admin," "editor," or "viewer." The "viewer" role, for example, grants the can-view permission, and the "editor" role grants the can-view and can-edit permissions over every resource in the system.
Once defined, roles are assigned to users based on their function in the organization. An IT manager, for example, will have the "admin" role for most tools. A salesperson will only hold the "editor" role for the CRM/a group of accounts in the CRM, so they can view, create and update relevant customer records.
While simple to stand up, RBAC doesn’t scale. As new scenarios come up, the easiest solution is, more often than not, to create new roles. As more and more roles are created to provide different permission sets, you reach “role explosion.”
For example, you hire a new type of employee: a CRM admin. You want to give this user the ability to add and remove users from the CRM, including bulk imports and deletions. But you don't want this individual to see any sales data or personally identifiable information. The quickest solution to support this kind of scenario with RBAC is to create a new, very specific role with only the necessary permissions. And that happens again and again until the number of roles is simply unmanageable. This situation also often leads to bizarre groupings of permissions and other hard-to-decipher role setups.
All in all, RBAC is great for organizations with a small set of predefined permission sets. Once fine-grained controls are required, or the ability to manage access to resources within hierarchies, RBAC is no longer a sufficient solution.
Example RBAC policy
Role-based access control systems expect the roles assigned to users to have the relevant permissions. This means that the RBAC policy needs to define the roles and map them to permissions. The mapping doesn’t change very often, so it can be defined statically in the policy.
As an example, this is how you can define three popular roles: "viewer," "editor," and "admin." A "viewer" would map to the view permission, an "editor" would combine the view and edit permissions, and an "admin" would group view, edit, and delete permissions.
These role-to-permission mappings change very slowly and can be captured in static mapping. When using the Open Policy Agent (OPA) for defining an authorization policy, these mappings can be placed in a data.json file and packaged up with the policy.
Here is an example of what the data.json file would look like:
{
 "roles": {
   "viewer": {
     "perms": {
       "view": {
         "allowed": true
       }
     }
   },
   "editor": {
     "perms": {
       "view": {
         "allowed": true
       },
       "edit": {
         "allowed": true
       }
     }
   },
   "admin": {
     "perms": {
       "view": {
         "allowed": true
       },
       "edit": {
         "allowed": true
       },
       "delete": {
         "allowed": true
       }
     }
   }
 }
}
As you can see from this example RBAC policies are quick and easy to set up but lack the flexibility required for fine-grained access control. In the example above we defined an Editor role that has read and write permissions on every resource in the system. If this was a document-sharing application, that would mean they could edit every document. This type of broad permissions is not something most businesses can live with.
Attribute-based access control is the next step. It allows organizations to have finer-grained control, enforce the principle of least privilege, and improve their security posture.
Step-by-step developer guides
Check out these developer tutorials for a walkthrough of the process of adding role-based access control to a Todo application:
Attribute-based access control (ABAC)

Attribute-based access control policies determine access to resources based on a set of dynamic characteristics called “attributes.” These attributes can be in regard to a user, resource, or environment.
User attributes include user-specific information, such as their name, role, team, seniority, projects, and more. Resource attributes include things like the resource’s owner, creation date, file name, folder, etc. Environmental attributes include data points such as the time of access, the location of the user, and if access is over a public network or VPN.
ABAC allows for fine-grained access control by authorizing based on attributes associated with the subject, resource, and environment. Rather than associating permissions with users as one does with RBAC, ABAC relies on dynamic attributes that are easy to update. As a result, ABAC systems tend to be easier to maintain as you scale. For example, an ABAC policy for a CRM would allow you to provide users with relevant customer records by merely updating the relevant attribute.
Attribute-based access control is a popular authorization model. It lays the foundation for fine-grained access control. ABAC allows you to define dynamic behaviors, which also means that you have to address all the potential values that attributes may have, or risk unwanted behavior. This is why implementing ABAC tends to be more time-consuming than RBAC, especially at first. Building and maintaining ABAC also requires more expertise than those required to support RBAC.
All things considered, ABAC provides you with the flexibility to secure access to resources based on nuanced criteria. It is a flexible and powerful model but requires some initial investment to get up and running correctly.
Example ABAC policy
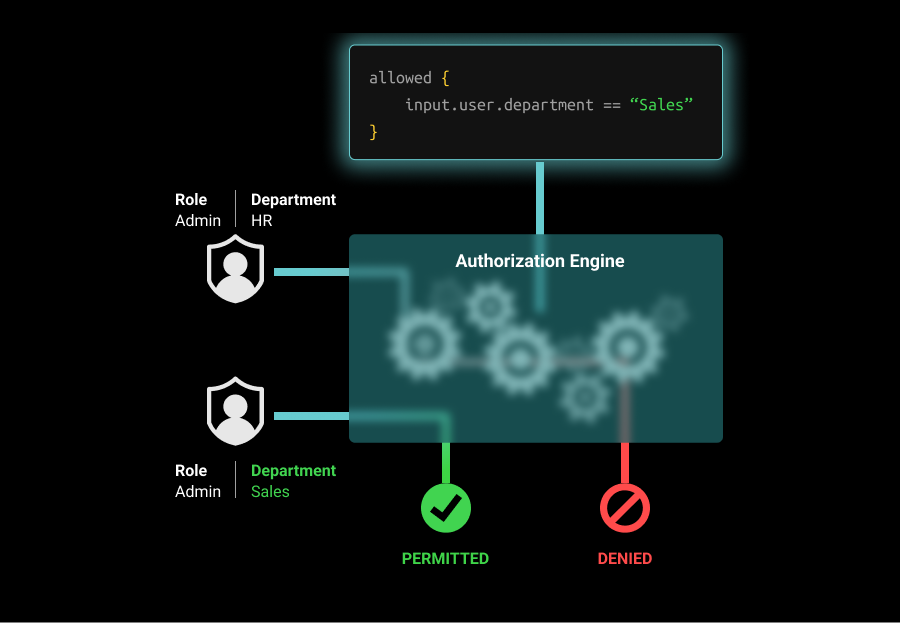
ABAC is a way of determining access to data based on the attributes of the user, resource, and environment. A simple example of attribute-based access control could be 'all users can read public data.' You can also use an ABAC policy to enforce more complex behavior, such as 'users from the Sales department can only edit CRM records during work hours.'
In this example, we’ll assume that the environment our policy will check is based on a dynamic attribute, like time of day or day of the week. We’ll define a list of allowed times of day and a list of allowed days of the week in a data.json file that will go with the policy.
Here’s an example of what this policy could look like:
allowed {
  ns := time.now_ns()
  day := time.weekday(ns)
  day == data.workdays[_]
  input.user.department == "Sales"
}
We’ll also assume that the time of day and day of the week when access is requested are dynamically updated by the application whenever an access request is recorded for the user. In the policy, we iterate over each of the allowed times of day and days in the week and compare them to the information for the access request. We also compare the user’s department to the list of allowed departments.
If the user has the Sales department attribute and is requesting access during a time and day that are included in the allowed sets, access will be granted. But if the user does not have the Sales attribute, or is trying to access the resource outside of the permissible workdays, access will be denied.
If you are thinking of upgrading your role-based access control system to an attribute-based one, check out this developer guide
Step-by-step developer guides
Check out these resources for more detailed instructions on adding attribute-based access control to your applications or APIs
Combining RBAC and ABAC
You don’t have to be married to one and only one authorization model. There are vendors out there, like Aserto, that allow you to combine different access control patterns as you see fit. RBAC might be more than enough for an internal tool or service, but not at all sufficient to secure access to your commercial offering, or business application.
You also might want to combine RBAC and ABAC to support common patterns, such as roles in multi-tenant SaaS applications where resource attributes ensure the user can only access the resources in their tenant and the role they hold determines the actions they can take. Another common pattern is resource-specific permissions, where resource attributes (e.g. document name or ID) are used in tandem with defined roles to determine the level of access a user has to a resource.
Here’s an example policy that combines RBAC and ABAC to enforce the following rules:
- If a user is an "admin," they may edit any file system resource - regardless of any other condition.
- If a user is an "editor," they may edit a file only if their location is in one of the permitted locations (US, Canada, France, or Italy)
user_attributes = input.user.properties

allowed {
  user_attributes.roles == "admin"
}

allowed {
  user_attributes.roles[_] == "editor"
  data.allowedLocations[_] = user_attributes.location
}
Sometimes combining RBAC with ABAC is the easiest way to enforce a specific set of rules. Other times, you might find you need finer-grained control. This is when relationship-based access control comes into play. In this model, relationships (e.g. owner, editor, viewer) between subjects (e.g. users/groups) and objects (e.g. tenants, organizations, teams, projects) are used to determine access. Learn more about ReBAC and how it is different from RBAC, here.
Conclusion
RBAC and ABAC are two popular models for securing access to resources. Role-based access control groups permissions within static roles that are associated with users. It is simple to set up and reason about. However, RBAC doesn’t scale well, especially when finer-grained controls are required.
ABAC uses dynamic attributes to determine access to resources. It allows for fine-grained access control and easier maintenance as you scale. But it comes with a cost of a heavier investment to get up and running and the expertise required to set the system up correctly.
Both authorization models have their merits and both have limitations. Thankfully, Aserto makes it easy for developers to combine role-based, attribute-based, and even relationship-based access control models, as they see fit throughout their stack.
Learn more about RBAC, ABAC, and ReBAC in this comprehensive eBook. And if you have any questions, you can schedule time to speak with an engineer about your authorization challenges.
&color=rgb(100%2C100%2C100)&link=https%3A%2F%2Fgithub.com%2Faserto-dev%2Ftopaz)


